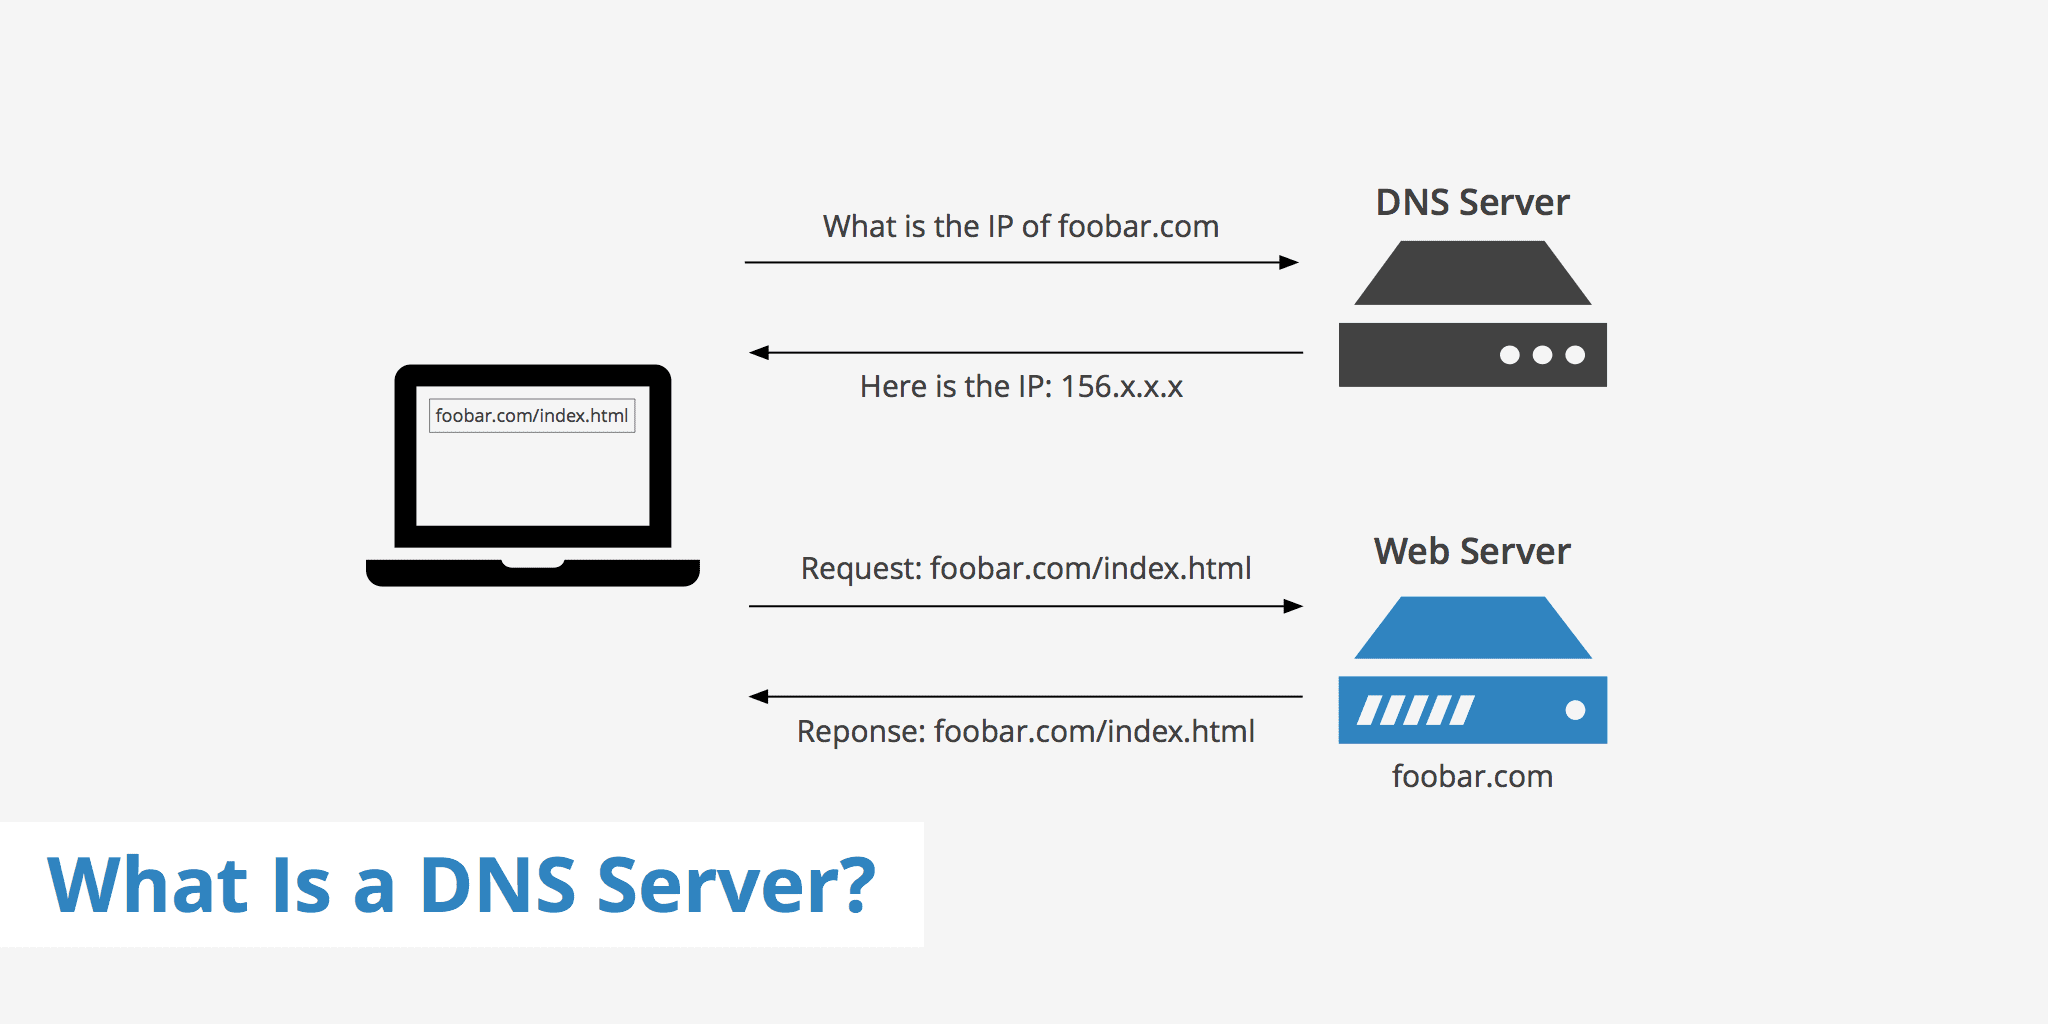
DNS is a database consisting of domain names and IP Addresses. So, whenever we enter google.com or yahoo.com, our computer contacts DNS servers and asks what IP Address is associated with both domain names. After getting the IP Address, it connects to the web server of the visiting site. Then it loads and displays the web content. You can visit any site through its IP address. Just type in the IP Address in the web browser, and you will see the website. However, we use the domain name because it’s easier to remember.
How Important is DNS?
In short, without DNS, the whole internet will not be accessible, and we will be rolled back to when the internet used to be a dream. We will be left with our computers, where we can only play offline games. Now coming to the next part, different ISP uses different DNS servers. If you are not using any specific DNS server on your computer or router, then you might be using your ISP’s DNS servers.
Problems With DNS Servers
Usually, people face DNS-related issues because they choose to use the default DNS servers of their ISP. If DNS servers are unstable, you can expect a few problems while connecting to different websites. You will get some unwanted browsing errors.
Some of the DNS errors include:
DNS Lookup Failed On Google Chrome Err_Connection_Timed_Out Error Err_Connection_Refused Error Dns_Probe_Finished_Nxdomain Error DNS Server Not Responding On Windows
The list doesn’t stop here; if you are getting any of these errors, you can blame your DNS. However, DNS-related issues can be resolved by switching to Public DNS servers.
Benefits of Using Public DNS Servers?
There are multiple reasons why tech guys still prefer Public DNS servers over ISP. The most probable reason is to avoid unwanted errors. Another thing is that Public DNS servers like Google DNS and OpenDNS can improve your internet browsing speed because it improves the resolve time. ISPs block access to certain websites by resolving their site names to the wrong IP Addresses. By using a Public DNS, you could easily avoid such blocking. Furthermore, some public DNS, like Google DNS, resolves hostnames faster than ISPs.
So, which is the best Public DNS Server? (Google DNS vs. OpenDNS)
In my opinion, Google Public DNS Server is the best and one of the fastest DNS servers many users use. DNS Server Google ensures better security and a faster browsing experience. The other best option is OpenDNS which is a cloud-based DNS Server. With OpenDNS, you will get extended features like customizable filtering, theft & phishing protections, etc.
Steps To Use Google DNS In Windows (Google DNS Settings)
Well, using Google DNS On a Windows computer is easy; you just need to follow some simple steps below. So, let’s check out how to use the fastest dns servers.
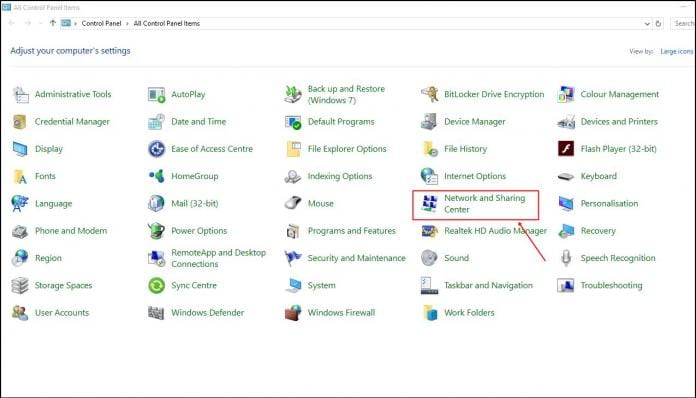
On your Windows computer, browse the Control Panel and choose Network and Sharing Center.
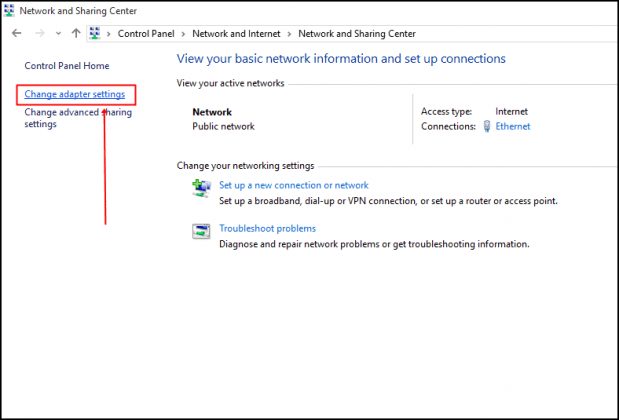
In the next window, you need to click on the Change Adapter Settings.
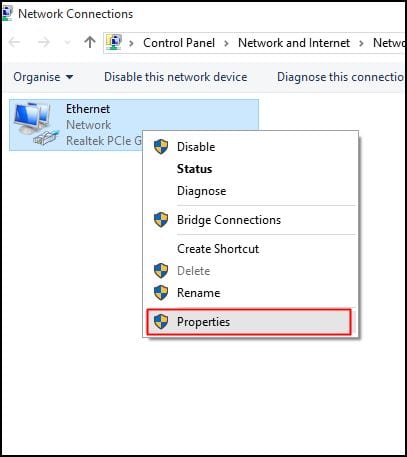
Now, you will see your connected network. Right-click on the connected network and then click on ‘Properties’
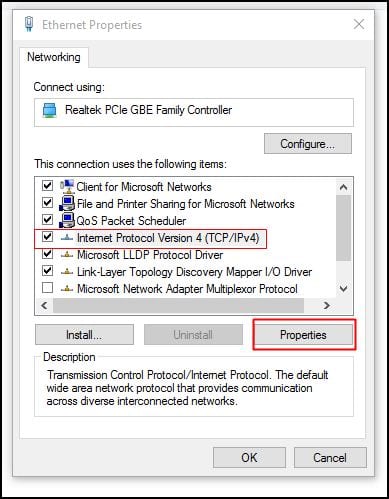
Browse to the Networking tab, and under ‘This connection uses the following items’, select Internet Protocol Version 4 (TCP/IPv4) and click on properties.
Next, under General, choose the option ‘Use the following DNS Server Addresses’. Fill in the DNS Value 8.8.8.8 or 8.8.4.4 and then click on ‘Ok’ then restart your network. Google DNS IP: 8.8.8.8 or 8.8.4.4
That’s it! You have just switched to the Google DNS Server. You will feel a noticeable improvement in browsing speed.
Using Public DNS Servers
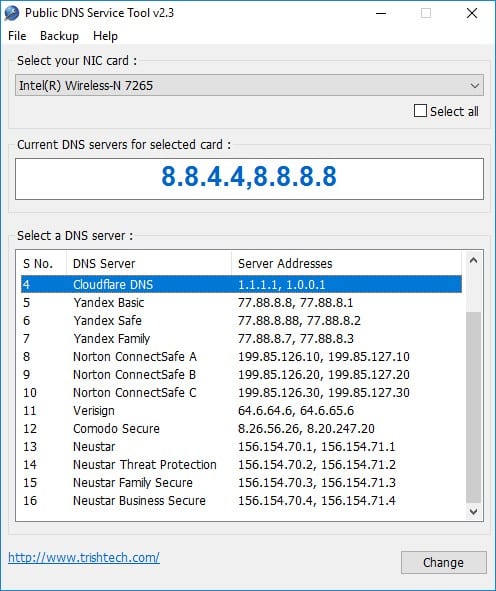
Public DNS Server is one of the best DNS server changer software available for the Windows operating system. In this tool, users don’t need to go through manual stuff, as it can switch the DNS server automatically. Below, we will share a tutorial on how to download & install Public DNS Servers on your Windows 10 computer.
- First, visit this link and download the Public DNS Server on your Windows computer. Once done, install the tool.
- Run Public DNS Server, click on Backup, and then back up the current DNS settings for easy restoration.
- In the next step, select the current network adapter from the drop-down menu.
- Now you need to select the DNS server of your choice, like Google DNS or OpenDNS, and click on ‘Change‘
That’s it! This is how you can use the Public DNS Server tool to switch to Google DNS easily. After switching, you will notice an increase in browsing speed. So, this is the Google DNS setting that you can apply on your connected network to improve the browsing speed. The methods we have shared will surely speed up the web browsing speed. If you have any other doubts, then make sure to discuss them with us in the comments.