Although Cortana has long lost the AI voice assistant battle to its competitors, it’s still a part of Windows 10. Every new version of Windows 10 comes with Cortana built-in. In addition, Microsoft has placed Cortana right on the taskbar for easier access. However, many users don’t seem to like Microsoft’s Cortana at all. Before Windows 10 May 2020 Update, it was not easy to remove Cortana from a system. If you delete all files related to Cortana, you will face other issues like Windows search not working, Start Menu not opening, and more. However, things have changed with Windows 10 version 2004 when Microsoft has decided not to include Cortana as a part of Windows 10. That means you can easily remove Cortana from your computer if it is running on Windows 10 Version 2004. Also Read: Download Microsoft Cortana App in Windows 10
Steps to Uninstall Cortana From Windows 10 PC
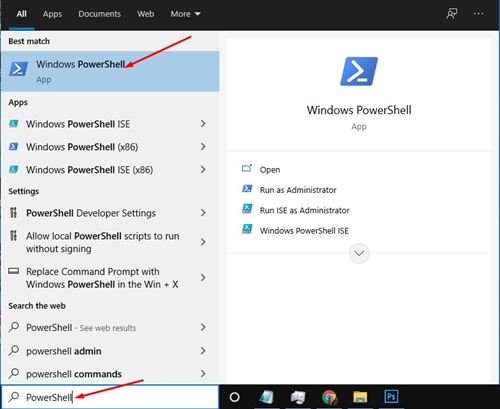
So, if you also don’t like Cortana on Windows 10, it’s time to uninstall it. Below, we have shared a step-by-step guide on how to uninstall Cortana from Windows 10. Let’s check out. Step 1. First of all, open Windows 10 search and search for ‘PowerShell‘.
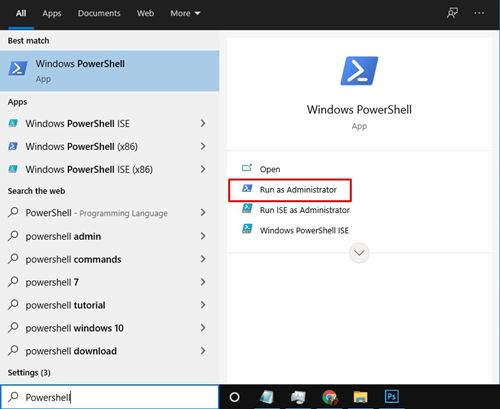
Step 2. Right-click on Windows Powershell and select the ‘Run as administrator’ option.
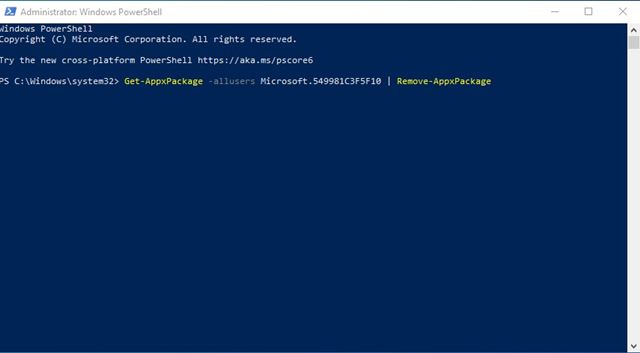
Step 3. On the PowerShell Window, copy and paste the command given below and hit the Enter button Get-AppxPackage -allusers Microsoft.549981C3F5F10 | Remove-AppxPackage
That’s it! You are done. This is how you can uninstall Cortana from Windows 10 computer.
How to Reinstall Cortana?
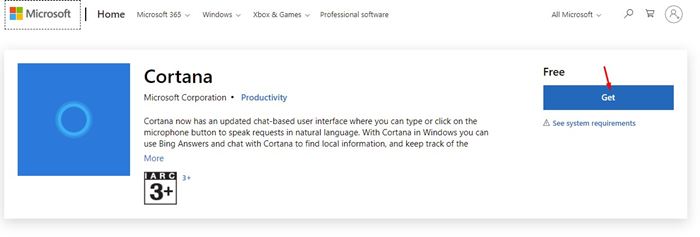
Microsoft Cortana is available as a standalone app on the Microsoft Store. So, if you wish to reinstall Cortana on your system, you can get the app from the Microsoft Store.
To reinstall Cortana on Windows 10 computer, head to this link and click on the ‘Get’ button. Cortana is free to download and use. So, this guide is all about how to uninstall Cortana from Windows 10 computer. I hope this article helped you! Please share it with your friends also. If you have any doubts related to this, let us know in the comment box below.


